How to make a pool step by step
You can refer to the simple step-by-step drawing guide below.
Also, read: kids coloring pages
Step 1
We will follow this tutorial with a classic rectangular design for drawing a pool. So, when you draw, the ruler will be an easy tool because there will be a lot of straight lines. Once you have the ruler ready, we can start drawing rectangles. As our reference picture shows, this is more difficult than expected because the lines are at light angles. Using it as a guide, carefully draw the rectangle. You can then use some turns for the upper part of the pool ladder. The ladder will be easier now, but we’ll add some details soon! Dean,
Step 2 – Then, draw some more shapes of the pool.
The second step of drawing your pool will be easier for you. For this step, we will draw the inside of the pool frame. Use your ruler to draw more lines parallel to the sketch you drew in the previous step. The result will be a rectangle, almost like a photo frame. Be sure to leave a few small holes where the ladder will go to the next step, and you can use a reference image to show you where it should be.
Step 3 – Now, pull the ladder to the pool.
In the first step of this tutorial, you started the ladder on drawing a group, and now you can finish this aspect. Use the lines you have drawn for the ladder; add some straight and curved lines to complete the frame, as shown in our reference. Finally, you need to attach two steps to the ladder’s frame.
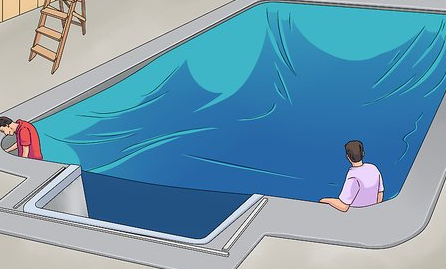
Step 4 – Follow the pool.
Jumping into a pool without water would not be a fun experience! For this reason, we will add something to your drawing in this section. First, draw a small line below the top corner of the pool. Once you’re ready, we’ll add some wavy lines near the inner boundary. They will go around the pool, and the reference image will show you where to go for this view. Then we have just a few final details to add to the next step before you color.
Step 5 – Now, complete your pool drawing.
This part of the tutorial will cover the final details of the drawing. The most important aspect we will draw is between the two sketches of the pool. These lines will show that there are many small tiles in the circle of the pool that make it. Once you’ve added all these lines, you’re done with the details! However, you don’t have to go through that yet, because you can add some custom details you want. You can draw some people swimming in it or even paint some big pool toys that float in it so that some of the colors change later. Once you have mastered this drawing, you can also use what you have learned to create variations of yours. What final details do you think you would use to complete this drawing?
Step 6 – Fill your pool drawing with some colors.
This is the final stage of your painting process, and in this step, you can add some brilliant colors to complete your painting. We used some gray, brown, and blues for the environment and the water. Here are some colors you can use for your painting, but make sure you use whatever color you want! Once you know which color you want, you can also decide on the different art media and tools you will use to complete